How and when to replace the float in a mini condensate removal pump
Spring is back, and it’s time to get your air conditioning system ready for use once again after a long period of inactivity. Leaving the system switched off for so long can affect the entire condensate removal circuit. And, as every professional knows, it’s often important to carry out a few tasks in order to avoid issues down the line.
Simple cleaning to prevent the float becoming stuck
In two previous blog articles, we discussed how to avoid the main risks associated with the condensate that forms in any kind of air conditioning unit – split systems, cassettes, and even building air treatment units.
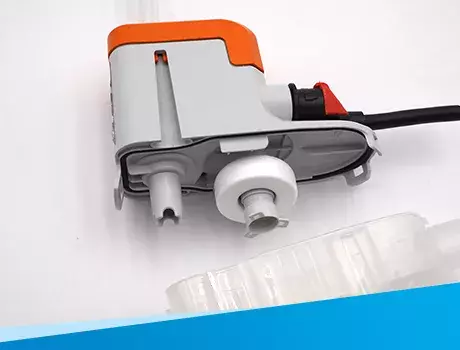
First of all, it’s highly advisable to inspect the entire condensate removal system to make sure it’s clean. In winter, the circuit can become clogged (with dust, spider’s webs, and so on), which can cause blockages in certain locations. Next, the presence of biofilm, lacquers, aerosols or even dust in the condensate, even in small amounts, can be problematic: as these pollutants dry out, they can cause the float in the condensate removal pump’s detection unit to become stuck.

If this happens, the float won’t rise as the detection unit’s tank fills up, meaning the pump won’t be activated to remove the condensate. In our cleaning guide, we explain how to fix this issue without risking damage to the pump or the detection unit – and we stress that this kind of task is best left to a professional.
We also recommend that certain key parts of an air conditioning system undergo routine inspection. The 10 checks for preventing water leaks from air conditioning units are detailed in our maintenance guide.
|
Reminder: |
In any event, it’s highly advisable to connect the mini pump’s alarm circuit. That way, the pump will automatically switch off the air conditioning unit if a problem arises. In turn, this will prevent condensate overflows and leaks, which can cause water damage.
Replacing the float in a just a few steps
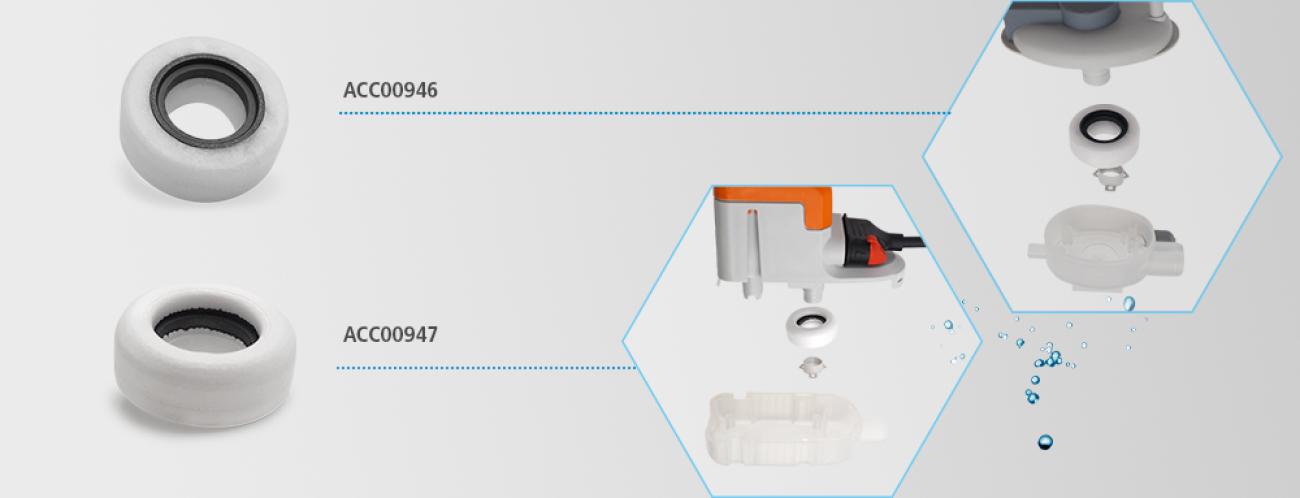
In a few very rare cases, you might find that the float no longer functions properly. If the float sinks but fails to rise with the water level in the detection unit’s tank, then it’s time to replace it. We offer two replacement floats which, together, cover all Sauermann pump models:
| Model | Float ACC00946 for pumps with a standalone detection unit (bi-block pumps) |
Float ACC00947 for pumps with an integrated detection unit (monoblock pumps) |
|---|---|---|
| Compatible pumps | Si-30 | Si-33 | Si-27 Si-20 | Omega Pack |
Si-10 Univers’L Delta Pack |
| User manual |
Replacing a float is a simple but delicate operation. Ideally, it’s a task that should be entrusted to a professional. The user manual provides step-by-step instructions for installing the new float. There are some key considerations to bear in mind if you want to avoid any nasty surprises:
- Be careful when handling the float support. Although it’s easy to take apart, it’s fragile and poses an injury risk to the operator.
- Make sure the float is installed the right way around (the inner ring should be facing upwards).
- When cleaning the detection unit and float support during replacement, don’t use hydrocarbon-based products or solvents such as acetone, as these will damage the seal and the float itself and, over time, the membrane inside the core pump mechanism.
- The old float can be disposed of as normal recyclable waste.


Add new comment